Looking for a way to make Twitter more useful, if only for other people? One way is to create an automated Twitter bot that tweets images with useful descriptions. You could do this manually… or you could build it with Node.js and host it on a Raspberry Pi. Read on to find out how.
Why Build a Twitter Bot?

If you’ve ever been on Twitter and seen accounts that post photos, or facts, or cartoons, etc., then it’s overwhelmingly likely that these are automated. It’s a great way to build an audience of people interested in the same topic.
But there is another reason, beyond retweets and follows. Building a Twitter bot will teach you some useful programming skills. We’ve previously looked at how to build a basic Twitter bot with Python (also on a Raspberry Pi), but this time we’re taking a different approach.
In this project, we’re going to use Node.js to build a photo-tweeting bot on a Raspberry Pi. The photos will be photos from the First World War, accompanied by a short sentence and attribution). This information will be stored in an array, a basic database.
Get Started: Build Your Database
If you want to build a photo tweeting bot, you’ll need to start by collecting the images you want to share. These should either be your own images, or ones you’ve acquired under a Creative Commons or some other open source license.
You should also keep note of attribution and other information that you want to go with the images. We’ll come back to this information later, once the bot is up and running.
Install Node.js on Raspbian
Begin by installing Node.js. You should already have a Raspberry Pi up and running, with Raspbian installed. For this project, we recommend a Raspberry Pi 2 or later; the project was tested on the Raspberry Pi 3 B+.
In the terminal (or via SSH), update the system package list, and upgrade to the latest version:
sudo apt-get update
sudo apt-get dist-upgrade
Follow the on-screen prompt, and wait while your Pi updates. Once you’re done, reboot with
sudo reboot
When you’re done, use curl to download Node.js:
curl -sL https://deb.nodesource.com/setup_8.x | sudo -E bash -
Next, install it with
sudo apt-get install -y nodejs
When all is done, run a check to ensure the software was installed correctly. The easiest is to check for the version number:
node -v
The response should be something like v8.11.3 (or higher). If you see something like that, you can be confident that Node.js is ready to use.
Build Your Twitter Bot
The next stage is to input the code that will create the bot. Begin by creating a directory:
mkdir twitterbot
Then, change it to the new directory for your bot:
cd twitterbot
Here, create a file called server.js
sudo nano server.js
In this file, input a single line:
console.log('I am a Twitter bot!');
Press Ctrl + X to save and exit, then run the script:
node '/home/pi/twitterbot/server.js'
This should return the phrase “I am a Twitter bot!”. Now that you’ve confirmed this is working, it’s time to install the Twit library with npm (the Node Package Manager). Ensure this is installed by entering:
npm -v
Again, you should see a version number displayed.
Follow this with:
npm init
This begins by prompting you for information about the Node.js app you’re creating. Default options are displayed (like this) so you can just tap Enter to accept them. You can choose to input your own details too. Once this configuration is over, you’ll be asked to confirm the details with “yes”.
The next stage is to install the Twit module from the npm.
npm install twit --save
Wait while the files download into the node_modules subdirectory. Once that’s done, open the server.js file again in nano.
sudo nano server.js
Here, delete the command you entered earlier, replacing it with:
var fs = require('fs'),

    path = require('path'),

    Twit = require('twit'),

    config = require(path.join(__dirname, 'config.js'));
Save and exit as before.
Create a Twitter App
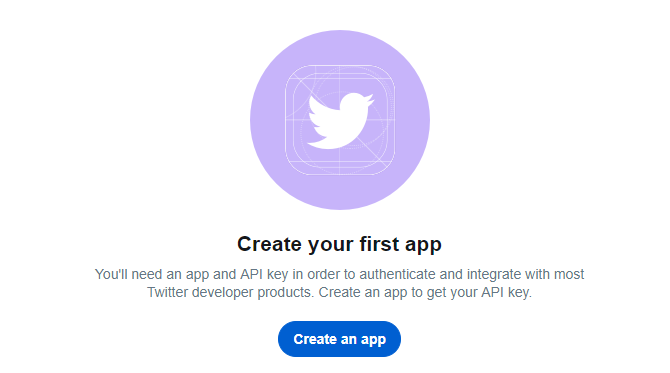
To build a working Twitter bot, you’ll need to create a Twitter app. This is a simple process, which requires you to first sign up for a new Twitter account. Note that this also requires a phone number to verify the account, and once this is done, head to developer.twitter.com to create the app.
If you don’t have a developer account, this may take some time, as there is a certain amount of form filling needed. This is a step Twitter has taken to avoid spam, so take your time and answer the questions accurately.
Click Create an App, and add the details as requested. At the time of writing, the developer system is undergoing an overhaul, so you may have to wait a few days (and answer some additional questions).
Next, switch to the Keys and Tokens tab, and under Permissions find the Access permission and ensure it is set to Read and Write (use Edit if not). Then switch to Keys and Tokens and make a note of the following:
- Consumer Key
- Consumer Secret
Under Access token, click Create to generate:
- Access Token
- Access Token Secret
These are the API keys which you’ll need for giving the bot access to your Twitter account.
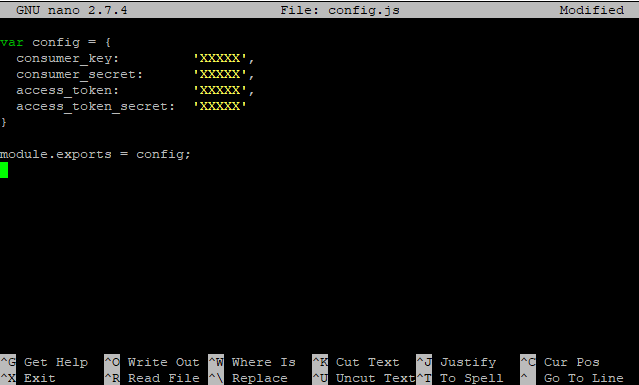
Back in the command line, create config.js in nano:
sudo nano config.js
Add the following
var config = {
 consumer_key:         'XXXXX',
 consumer_secret:      'XXXXX',
 access_token:         'XXXXX',
  access_token_secret:  'XXXXX'
}
module.exports = config;
Where it reads ‘XXXXX’, substitute your own corresponding API key details.
Save and exit, then open server.js.
sudo nano server.js
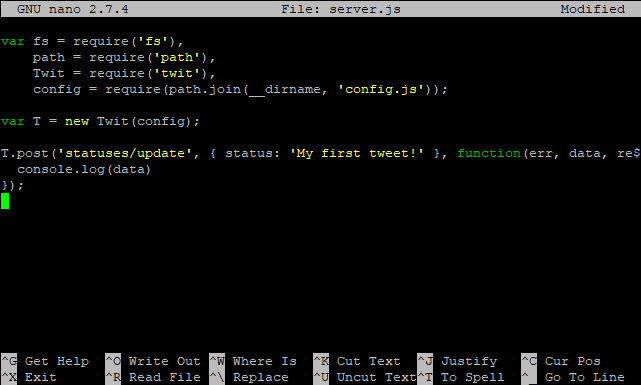
Here, append the following lines to the end of the file:
var T = new Twit(config);

T.post('statuses/update', { status: 'My first tweet!' }, function(err, data, response) {
  console.log(data)
});
It should look like this:
Again, save and exit, then in the command line, enter
node server.js
Open your Twitter account in the browser to see the results:
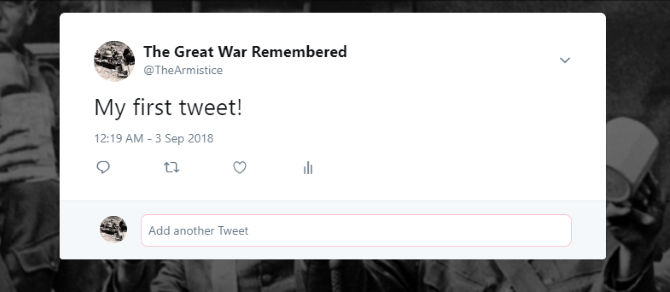
You’ve confirmed the bot is tweeting, so it’s time to give it something to do!
Create Your Folder of Images
To tweet photos, copy the images you collected into a folder (typically named images). Start off with a dozen or so.
Next, return to the server.js document:
sudo nano server.js
Here, remove the code that sent the tweet, the line beginning T.post(‘statuses/update’).
Next, replace this with a function, called random_from_array. This will pick an image at random from the images folder.
function random_from_array(images){
  return images[Math.floor(Math.random() * images.length)];
}
Once you’ve done this, you’ll need to add a second function, upload_random_image:
function upload_random_image(images){
  console.log('Opening an image...');
  var image_path = path.join(__dirname, '/images/' + random_from_array(images)),
      b64content = fs.readFileSync(image_path, { encoding: 'base64' });

  console.log('Uploading an image...');

  T.post('media/upload', { media_data: b64content }, function (err, data, response) {
    if (err){
      console.log('ERROR:');
      console.log(err);
    }
    else{
      console.log('Image uploaded!');
      console.log('Now tweeting it...');

      T.post('statuses/update', {
          media_ids: new Array(data.media_id_string)
        },
        function(err, data, response) {
          if (err){
            console.log('ERROR:');
            console.log(err);
          }
          else{
            console.log('Posted an image!');
          }
        }
      );
    }
  });
}
This function picks an image at random from the images folder, and once selected is uploaded to Twitter using the media/upload API.
Next, add the following code. This will find the images directory, and take an image from it, posting one at random every 60 seconds. You can (and should) edit this timing, which is represented in the code with the figure 60000. Longer gaps are advisable.
    setInterval(function(){
      upload_random_image(images);
    }, 60000);
  }
});
Save this with Ctrl + X, then Yes to save. (You can find the full code for this project at GitHub).
A single use of the node server.js command will then prompt the photos to begin tweeting! (Should you need to end the posts, press Ctrl + Z to cancel the server.js script.)
Adding Text to Your Photo Tweets
If you need to add text to your images, this can be done using an array. The array will refer to the filenames of the images and list the text that should be added. For instance, you might add attribution to images that you didn’t take. Or you might add some facts or a quote.

Begin by creating images.js
sudo nano images.js
Here, add the following code. This is an array, with two elements, file, and source. These hold the file name of the image, and the attribution (typically a URL).
var images = [
  {
    file: 'image0001.png',
    source: 'http://www.example.com/image0001.png'
  },
  {
    file: 'image0002.png',
    source: 'http://www.example.com/image0002.png'
  },
]
Repeat as necessary for each image, then end the images.js file with:
module.exports = images;
Save and close the file, then open server.js again, and add this to the list of variables:
images = require(path.join(__dirname, 'images.js'));
Save and exit, then restart the Twitter bot with the node server.js command once again.
You might also use the “source” field to include some text, explaining the background of the picture. This can be included alongside the URL.
Your First Twitter Bot, Ready to Reuse!
By now, you should have an auto-posting Twitter bot up and running, sharing photos, facts, and attributes on your given topic.
To summarize, the process is:
- Collect your photos
- Install Node.js
- Build your Twitter bot
- Apply for developer status on Twitter
- Create a Twitter app
- Add an attribution array
- Start tweeting!
Perhaps the best thing about this is that the code can be used to tweet photos, facts, and attributes on literally any subject.
Want to know what other bots you could run with a similar setup? Check our list of the best Twitter bot projects for the Raspberry Pi!
Read the full article: How to Build a Photo Tweeting Twitter Bot With Raspberry Pi and Node.js
from MakeUseOf https://ift.tt/2OgBtox
via IFTTT
0 comments:
Post a Comment