
Thanks to a streamlined, 1-click install, installing WordPress on Bluehost is incredibly simple. However, there may be cases where the Bluehost WordPress 1-click install isn’t right for your situation.
In this article, you’ll learn how to install WordPress on Bluehost using various methods. We’ll also cover what makes BlueHost unique for WordPress hosting.
1-Click Bluehost WordPress Install
On any web host where there’s no 1-click WordPress install option, you’ll need to set up WordPress manually.
You’re going to need two things: a domain name and web hosting. Bluehost provides both. Best of all, their basic web hosting plan is extremely cheap. Sign up using this link for a special Bluehost offer.
When you click the 1-Click Install sign-up button on the Bluehost site, you’ll see a screen where you can set up your domain name for your new site.
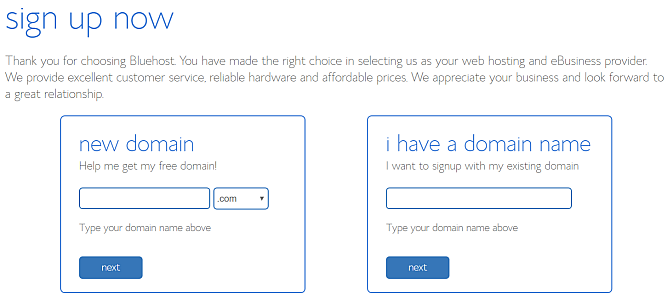
If you don’t have a domain name yet, then choose the new domain option. With your first year of hosting with Bluehost, a single domain is free.
The only catch is that your domain name needs to be available for registration.
If you already have a domain name, then go ahead and type it into the i have a domain name field.
The next steps are straightforward. Just fill out your personal details, choose the hosting plan you want, and fill in your payment details.
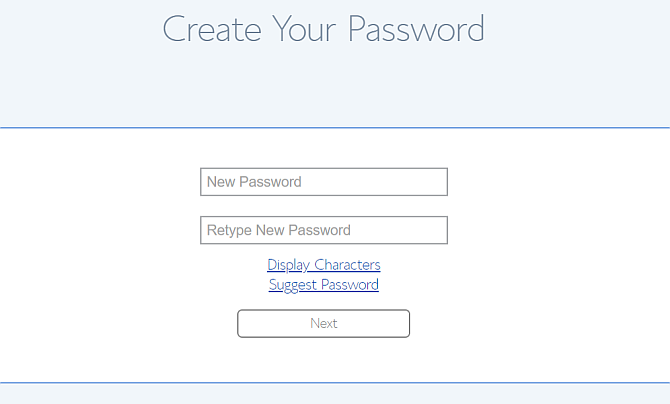
Finally, fill out a secure password to access your site controls.
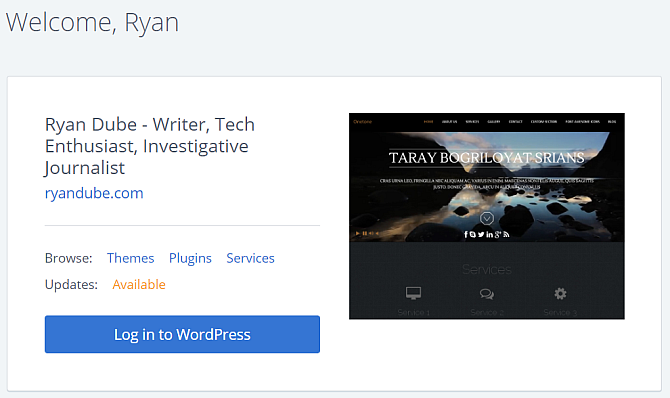
Once you’re done, you’ll see your main site portal page.
If you’re familiar with Cpanel on most web hosts, you’ll notice how much more simplified this control panel is (you can click on Advanced to see more of a traditional Cpanel).
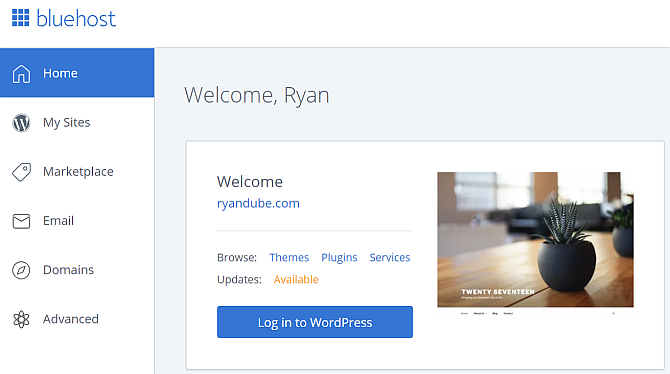
You’ll notice there’s a Log in to WordPress button. That’s because your WordPress site for the domain you chose, is already installed and ready to use.
It’s literally a one-click install. You’re done. Almost.
Transferring Your Domain to Bluehost
If you chose to take advantage of registering a single domain name for free, then you can stop here. The WordPress site is connected to that domain and live.
However, if you have an existing domain already registered, you’ll need to point it or transfer it to Bluehost.
- Assigning: This means you change the nameserver settings at your existing domain registrar to point to Bluehost
- Transferring: This means you change your registrar for that domain from your previous one to Bluehost
If you want to transfer the domain from your old registrar to Bluehost:
- Click on Domains in the left navigation bar
- Choose Transfer a new domain to your account
- Fill in the Enter domain to transfer field
Bluehost then manages your domain transfer for you. This is the easiest approach if you don’t know how domain transfers work, or you simply don’t want to deal with it.
If you’d like to keep all of your domains with the same registrar or don’t want to change domain registrars for any reason, you don’t have to.
Just go to the registrar where you bought your domain, and edit the nameservers there. You’ll usually find this under your Domain settings, by clicking on Manage DNS.
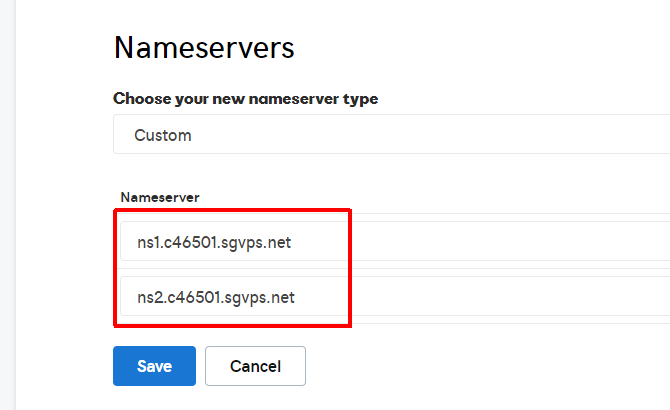
You’ll need to enter two nameservers.
The details for the first Bluehost nameserver are:
- ns1.bluehost.com
- 162.88.60.37
The details for the second Bluehost nameserver are:
- ns2.bluehost.com
- 162.88.61.37
It can take from 24 to 48 hours for the change to propagate. Once it does, the next time you type your domain into a browser URL field, you’ll see your new Bluehost website come up.
Transferring Your Website to Bluehost
If you’re transferring a website to Bluehost, the process is a little bit more involved. However it’s still only a moderate effort.
This process involves the following steps.
- Back up your old WordPress files
- Back up your old SQL database
- Create a new, matching SQL database on Bluehost
- Upload your old WordPress files to Bluehost
Step 1: Back Up Previous WordPress Site
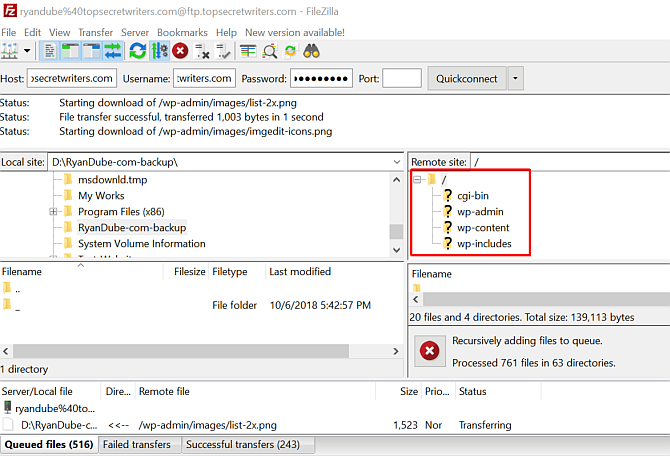
To back up your WordPress files, just connect to your old host with your favorite FTP client.
Upload all of the site files to your local computer in a location you’ll remember..
Next, go into the Cpanel on your old host, and download the SQL database for that site.
Step 2: Back Up Previous WordPress Database
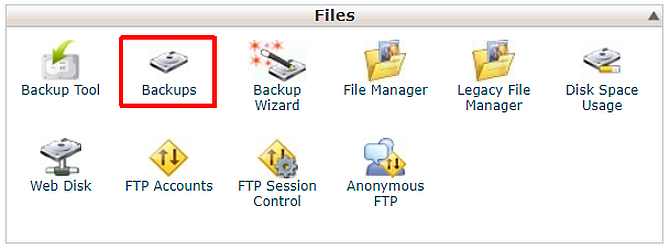
You’ll typically find this by clicking on the Backups icon.
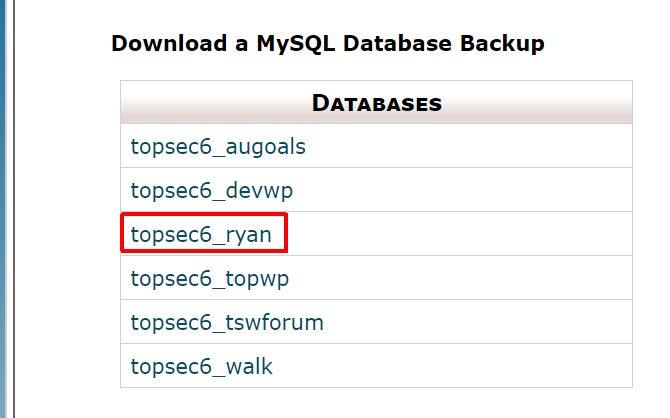
Scroll down to the list of your SQL databases, and click on the relevant database link to download it.
Typically it’ll get downloaded as a zipped file. When you upload the file at Bluehost, it’ll know how to handle it.
Now you’re ready to upload your old website into your Bluehost account.
Step 3: Import Your Database
Log into Bluehost, and click on Advanced in the left navigation panel.
Under Databases, click on MySQL Databases.
- Create a database using any website name you like.
- Scroll down and create a new MySQL User and password.
- Scroll down and under Add User To Database, assign the new user to the new database.
- Check the ALL PRIVILEGES box on the final Manage User Privileges page.
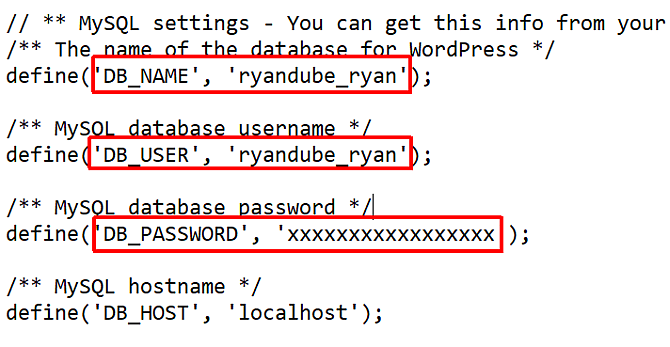
Now, go to the directory on your computer with the old website files you backed up, and find the wp-config.php file in the parent directory.
Edit the three lines in the config file where the database, user name, and user password is defined.
Now import the database you backed up by clicking on Advanced in your Bluehost Portal Page, and clicking on phpMyAdmin.
Select the new database you created, click on Choose File and select the database you backed up previously.
Make sure Partial Import is not selected, and the database format is SQL.
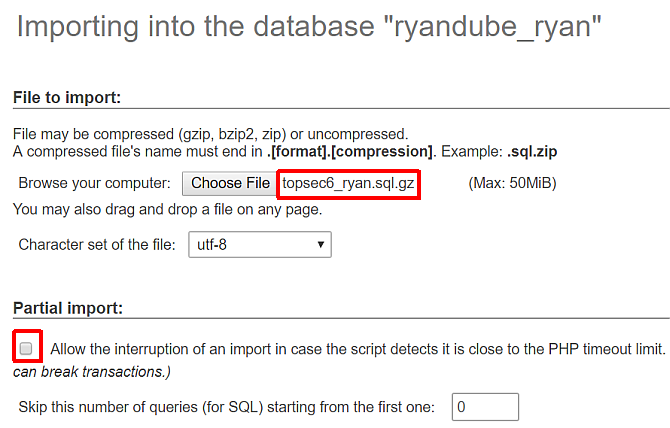
Click Go, and in a few seconds you should see a message that the import was successful.
Step 4: Import Your WordPress Files
Under the Files menu, click on FTP Accounts and scroll down to the list of FTP accounts.
For the one that is mapped to your home directory for the website you’re transferring to, click on Configure FTP Client and note the login details. Your password will be the one you signed up with when you opened your Bluehost account.
Open your favorite FTP client and connect.
Delete all of the files under the public-html directory on your Bluehost account. Replace those files with all of the files you backed up from your other WordPress site.
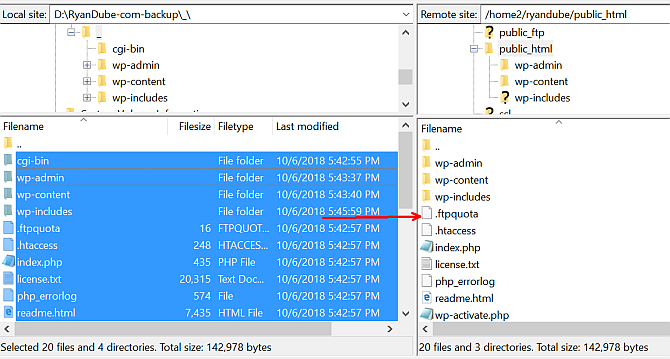
Once all of the files are uploaded, your site is fully transferred and live on Bluehost!
Just go back to Home in your site portal to see your site displayed in the preview window.
Installing a New WordPress Theme
Transferring to a new host is also a great opportunity to refresh your site theme.
When you click on the Home tab in your Bluehost portal, you’ll notice there’s a Themes link in your website preview window.
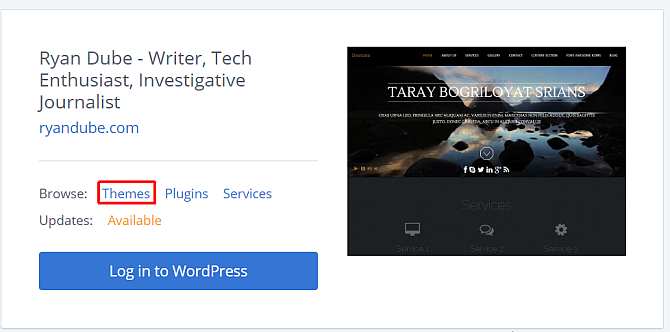
This will take you to the Bluehost Themes & Templates marketplace. You’ll find thousands of templates here available for purchase.
Regardless where you purchase it from, the upload process to your Bluehost WordPress site is the same.
Use your favorite FTP client to upload the theme folder containing all of the theme files, to the /wp-content/themes/ directory.
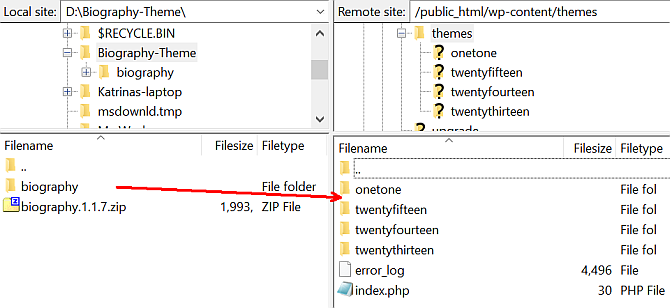
Once all files are uploaded, open up your WordPress admin panel, click Themes, find the theme you’ve uploaded, and click Activate.

You may see a message in WordPress that you’re missing a few plugins for the theme. Just click Begin installing plugins to install them all.
Installing WordPress on Bluehost: Simple and Done
As you can see, there are a lot of parallels between a Bluehost WordPress installation or a migration.
The main difference is how the Bluehost Portal looks, and the differences between a BlueHost Cpanel and a standard one. Luckily, Bluehost offers all of the tools you need to start a new site, or migrate over an old one.
If after all this, you aren’t entirely sure you want to stick with Bluehost. Have no fear, we’ve provided a list of the best WordPress hosting providers available. Have a look at some of those to see if they suit your needs ever better.
Read the full article: How to Install WordPress on Bluehost
from MakeUseOf https://ift.tt/2Cnp4vP
via IFTTT
0 comments:
Post a Comment