Running Windows 10 and hit a problem? Perhaps malware has disrupted your system, or things are generally running slowly. You might even be planning to sell your computer.
Fortunately, Windows 10 has the tools to help: System Restore and Factory Reset, utilities that enable you to easily reset and refresh your PC.
Here’s how to restore and reset Windows 10.
Windows 10 Has a Hidden Recovery Partition
When you open File Explorer, you should see all the disk partitions.
However, some are hidden. One of these is the recovery partition, which Windows 10 uses to reset and restore itself.
Although it takes up some space, and you can delete this partition, it isn’t advisable.
Sure, deletion, in conjunction with file compression, can save over 6GB on 64-bit systems running Windows 10, but the recovery partition is pretty vital for getting your PC back up and running following a serious crash.
Meanwhile, if you’re using a small capacity Windows 10 device, it’s recommended that you use an SD card or an external storage device. Keep the recovery partition and store personal data, and apps on the secondary storage.
At some point, you’ll probably need the recovery partition, especially if you haven’t downloaded the installation media. However, the refresh and reset tools should be sufficient to deal with the vast majority of issues, as long as you make the right decision between a system restore and refreshing Windows.
How to Do a System Restore in Windows 10
If you’re having problems with Windows 10’s performance, the first thing you should look at is your list of restore points. If one of these coincides with when Windows started to misbehave, then you can use the System Restore tool to reinstate the settings and software that were in place at that time.
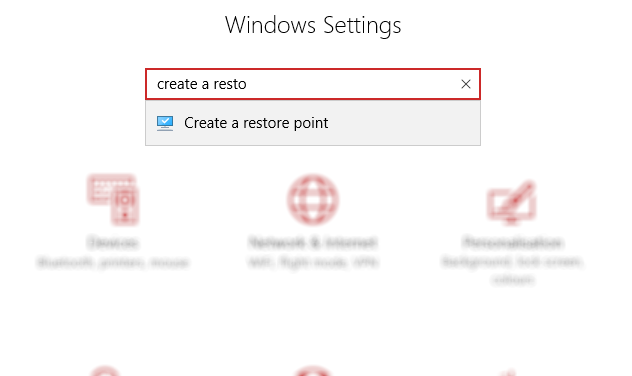
Open Start (or press Windows key + I to open Settings) and in the search box type create a restore point.
Click the matching result, select the drive you want to use to store your restore point (typically the system drive) and click Configure > Turn on system protection. This action activates the system restore functionality.
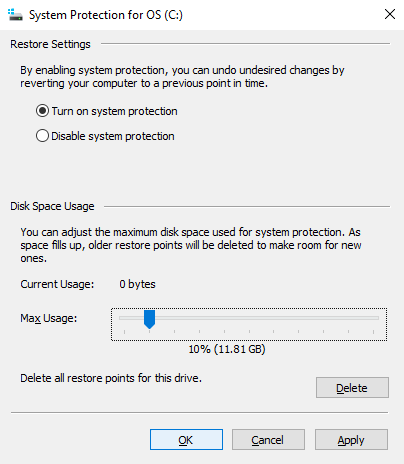
You also need to specify the maximum disk usage dedicated to Disk Space Usage. Drag the slider to determine how much space to allocate. Click OK to confirm.
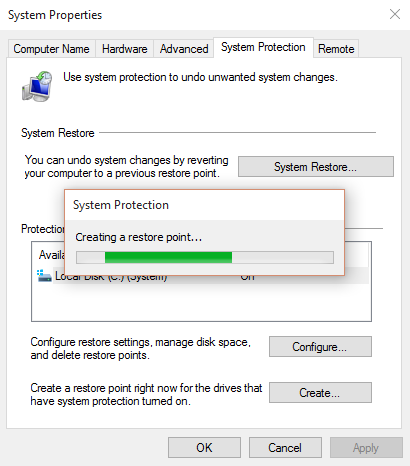
You’re now ready to create a restore point, so click Create, give it a name, then OK.
The system protection software will create the restore point, which you can revert to later using the System Restore button. Working through the wizard will restore your previous state.
You may need to spend a few moments checking through what will be affected so that you can reinstall software and—hopefully—avoid any apps that caused the problem that prompted you to use System Restore.
Note that System Restore is not perfect. Winding back to a restore point may not work, so refer to our list of things to check when System Restore won’t work.
Accessing Advanced Startup
What if you need to roll back to a saved restore point, but cannot boot into Windows 10? The answer comes through Advanced Startup (accessible on a working system through Settings > Recovery).
If your PC isn’t booting, you’ll need to access Advanced Startup via your PC manufacturer’s instruction. For instance, on HP computers, this would be by pressing F11 to prompt the System Recovery mode as your computer boots. Choose Repair your computer when Windows Setup launches.
In Advanced Startup, select Troubleshoot > Advanced Options > System Restore, and then work through the wizard to find and apply the restore point.
This makes System Restore the fastest solution; at the same time, however, it is also the least reliable. Unfortunately, System Restore is unable to cope with a Windows installation that has been compromised by malware.
How to Refresh Windows 10
Was reverting to a restore point not enough to resolve problems with your computer? You may need to refresh your settings. Remember how your computer was when you bought it, or first installed Windows 10?
That’s what you’re going to get.
Unlike a full Windows 10 system reset, however, you will be able to retain your personal data and settings. However, it’s a good idea to sync these to the cloud regardless.
Open Start > Settings > Update & Security to begin, selecting Recovery in the left-hand menu.
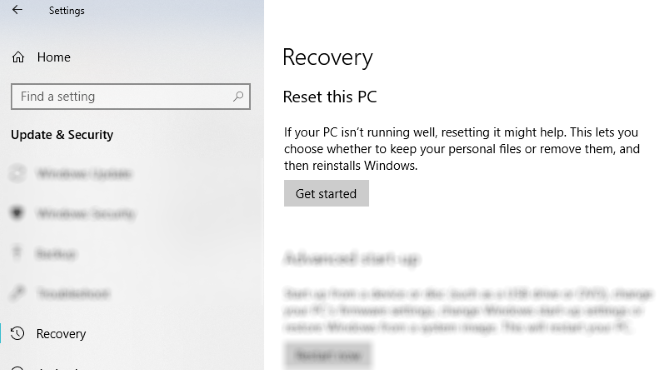
Under Reset this PC, click or tap Get Started, and use the Keep my files option.
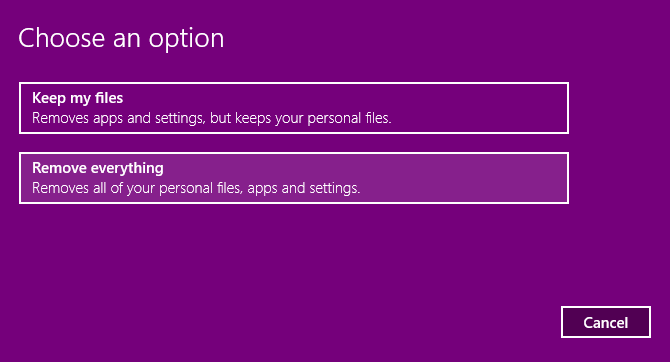
A warning will be displayed; a second may appear if you have upgraded to Windows 10 from a previous version and informs you that resetting will prevent you from undoing the upgrade.
If you’re happy, proceed with the Reset.
You’ll need to wait for the process to complete. How long this takes will depend on how many apps you’ve installed.
Consider refreshing Windows 10 the second string to your bow. If your computer is running slow, and crashes or freezes regularly, this is the option to take. It’s ideal if you don’t have the time to back up your settings and personal folders first.
How to Reset Windows 10 to Factory Settings
The “nuclear option” when it comes to getting Windows 10 back to its best is to reset it, much as you would a smartphone or tablet. This action restores the operating system to the “factory settings,” leaving it seemingly as new.
As such, you will need to back up your personal data beforehand. Unfortunately, any bloatware you have removed will be reinstated. This is a strong argument against using the factory reset option.
To factory reset Windows 10, go to Start > Settings > Update & Security > Recovery and again click the Get started button under Reset this PC. This time, however, select Remove everything.
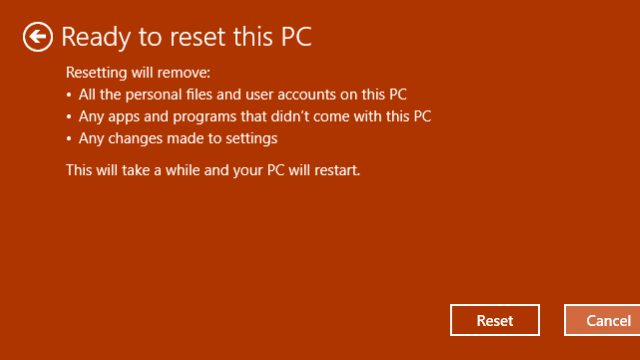
This results in two options:
- Just remove my files for a quick reset.
- Remove files and clean the drive, a slower, more secure option.
With your choice made, wait for completion. Note that you’ll need a new account to begin using your computer again. If you have a Windows account, use this; your desktop theme, shortcuts, browser favorites (if you use Edge) and some other settings will be synced back to the computer. Otherwise, create a new local profile.
You’ll then be ready to restore any data backups you made before you performed the Windows 10 factory reset.
As before, if Windows 10 won’t boot and you want to perform a factory reset, the option is available from the Advanced Mode screen. After booting into Advanced Options, go to Troubleshoot > Reset this PC and you’ll find the options as discussed above.
Factory Reset and System Restore Made Easy
Whether you need to create or restore a System Restore point, the process should by now be straightforward. Similarly, you should be able to refresh Windows 10 in order to speed things up a bit, and use the reset option to create a freshened-up, good as new operating system.
Regardless of whether you can use System Restore, or refresh and reset your PC, however, it’s a good idea to make regular data backups. Our guide to making data backups in Windows will help you out here.
Read the full article: How to Factory Reset Windows 10 or Use System Restore
from MakeUseOf https://ift.tt/2BT0Eel
via IFTTT
0 comments:
Post a Comment