Custom ringtones are a great way to personalize your phone. iPhone owners can buy new ringtones from iTunes, but that’s a lot of money to spend on something so simple.
There’s a better way: Did you know you can also make ringtones right on your iPhone? You can record any sound or create your own musical masterpiece, and turn it into a ringtone all using the phone in your pocket. It’s easy to take any non-protected music track you have on your device and make a ringtone from it.
What You’ll Need
You don’t need to download an expensive third-party music app to make ringtones on your iPhone. You can use Apple’s own GarageBand, available free from the App Store. It works on any iPhone or iPad running iOS 11 or later. To check which version of iOS you have on your device, go to the Settings app, tap General, and choose Software Update.
It’s simple to store your created GarageBand track in iCloud. Then you’re able to open it on any other iPhone, iPad, or even the Mac version of GarageBand.
GarageBand is a powerful multitrack music sequencer that you can use to create professional-sounding songs. With this tutorial, though, you’re going to take an existing music track and turn it into a ringtone. It all happens right on your iPhone—no computer needed. Let’s get started.
Download: GarageBand for iOS | Mac (Free)
Step 1: Create a GarageBand Project
Tap the GarageBand icon on your phone to open it. If you’ve used the app before, you’ll see a list of projects you’ve already made. Your ringtone must be in its own project, so to make a new one, tap the Plus button in the top-right corner, then select the Tracks tab.
Now you can swipe sideways to choose between any of the built-in instruments, the sound library (which includes prerecorded sounds and loops), and the Audio Recorder. To import an existing song into your new project, choose Audio Recorder by tapping on it.
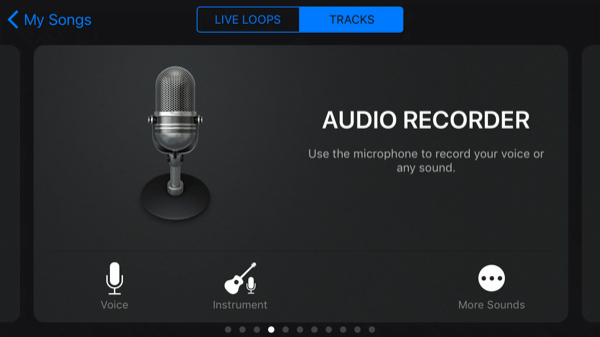
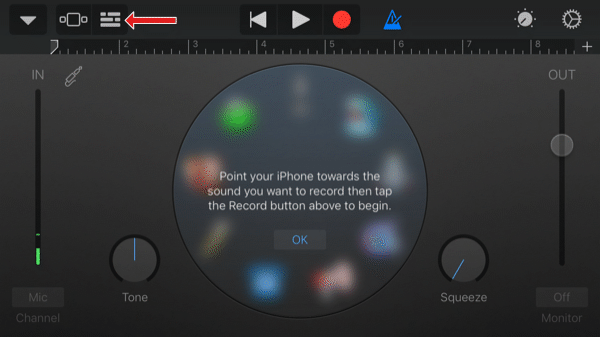
The Audio Recorder screen is all set up for recording sounds, which can be a fun way to make new ringtones. But if you want to turn an existing piece of music into a ringtone, you won’t need any of those fancy controls.
Instead, tap the third icon from the left at the top of the screen (shown below with an arrow) to go to the main editing screen.
Step 2: Import Music
GarageBand can import any unprotected music track that’s on your iPhone. It can also do this for tracks in places your iPhone can access, like your iCloud or Dropbox account for example.
Unprotected music is music that doesn’t have DRM (Digital Rights Management) attached. Songs downloaded from iTunes are usually off-limits, though we’ve shown how you can turn your iTunes music into ringtones on your desktop. However, there are loads of other places to download music, including lots of free ones.
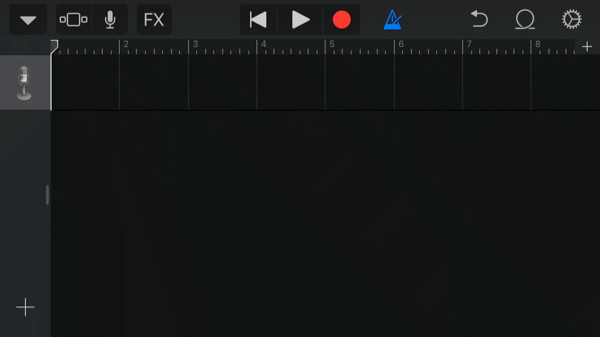
To import a song, click the loop icon (second from right) at the top of the main GarageBand editing screen.
Tap Files, then Browse items from the Files app to see all the music files your iPhone has stored. Below you can see a track we’ve downloaded from the Free Music Archive and saved in iCloud. Tapping on a file will copy it to your phone.
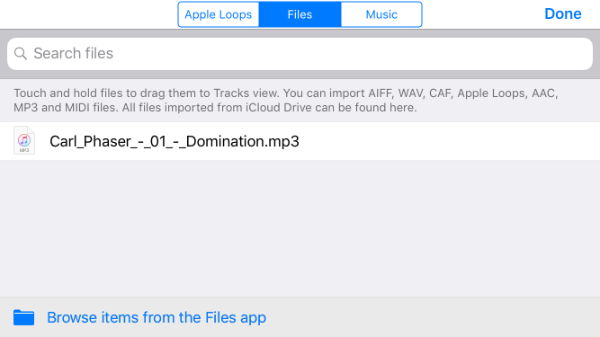
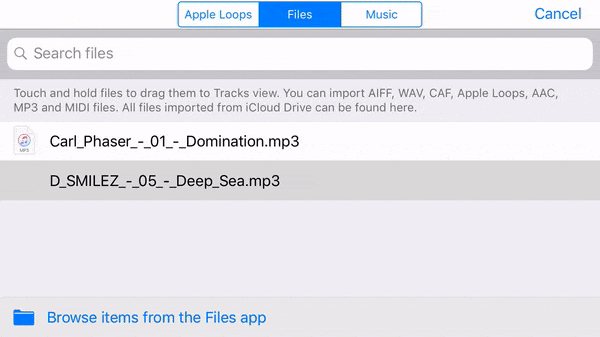
Once your chosen file has downloaded to your iPhone, you’ll be taken back to the Files tab. Next, tap your finger on the song you want to use as the ringtone, hold it, then drag it up towards the top of the screen. The list of files will hide so that you can drop the song into the main editor, like this:
You can listen to the music you imported by tapping the Play button at the top of the screen. If you just want to turn this track into a ringtone without making any changes, then you’re almost done!
Step 3: Export the Ringtone
Before you can turn the music into a ringtone, you need to go back to the list of projects. Tap the downward-facing triangle icon in the top-left, then tap My Songs. GarageBand will take you back to the project list, where your new song will show up as My Song. If you’d like to change its name, tap and hold it to bring up the contex menu, and choose Rename.
When you’re ready to turn your music track into a ringtone, you’ll need the contextual menu again. Tap and hold on your project, choose Share from the popup menu, then select Ringtone.
You can change the name of the ringtone again here if you want; otherwise just tap Export. It will take a few seconds for GarageBand to work its magic, then you’ll see a screen like this:
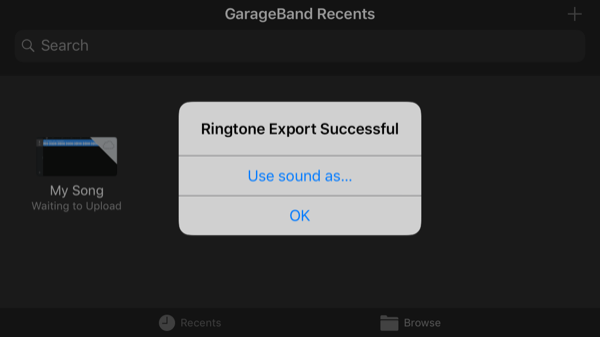
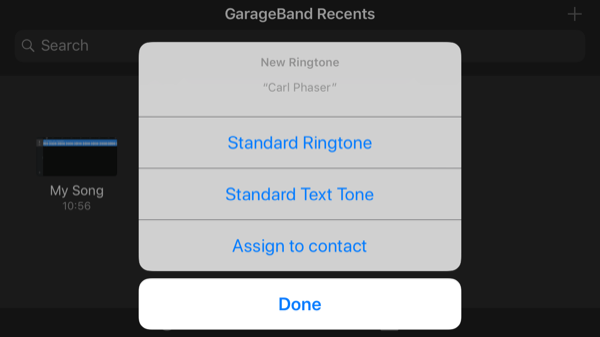
Now you can either tap OK to return to the project list, or Use sound as to use the ringtone right away. That will give you three options:
- Standard Ringtone: This will set the song as your regular ringtone.
- Standard Text Tone: Makes this song play every time you get a text message.
- Assign to Contact: This option lets you assign the song as the ringtone for a particular contact in your address book.
How to Change Ringtones on iPhone
If you don’t assign your new ringtone from within GarageBand, you can set it anytime. Head into the Settings app, choose Sounds, and then tap on Ringtone. Your custom-made ringtones will show at the top of the list, above all the standard ones that came with your phone.
If you want to use your ringtone for a particular friend or family member, you can select that person in the Contacts app, tap Edit, then choose Ringtone or Text Tone to use your new masterpiece.
Ultra-Personalized Ringtones
GarageBand is a really powerful music creation app. You’re not limited to using existing music tracks; you can compose your own using the built-in instruments. You can record sounds or music through your iPhone’s microphone too.
That’s a great way of making ultra-personalized ringtones for individual contacts. For example, you can record someone singing or saying their own name, and use it as a ringtone for that person.
The possibilities are almost endless, meaning you have an endless supply of unique and free ringtones.
Take your music creation further by reading our guide to GarageBand. And don’t forget that setting a fresh ringtone is just one of the important iPhone tweaks you should make.
Read the full article: How to Create Free Ringtones Directly on Your iPhone
from MakeUseOf https://ift.tt/2QNOWVI
via IFTTT
0 comments:
Post a Comment