
If you sign all or most of your emails the same way, you can create an email signature. It shows professionalism in business communications and acts as a digital business card. A well-designed email signature can also serve as a promotional tool for just about anything, like a business, website, blog, or a book.
We’ve discussed how to add an email signature in Outlook for the desktop. But what if you use the Microsoft Outlook Web App in Office 365? In this article, we’ll show you how to add, insert, and change your signature in the Outlook Web App in Office 365.
Step 1: Log Into Microsoft Office 365
To access Microsoft Outlook online, go to Microsoft’s Office site and sign in using your personal Microsoft account. Or you can log in with your business or school Microsoft account.
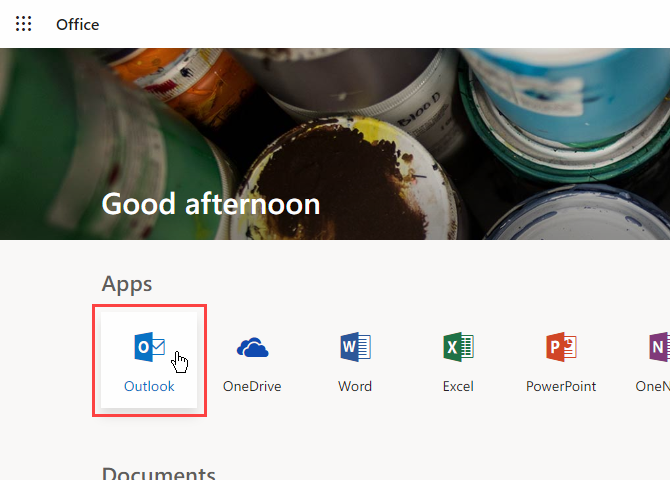
Then, click Outlook under Apps.
Step 2: Open Microsoft Outlook Settings
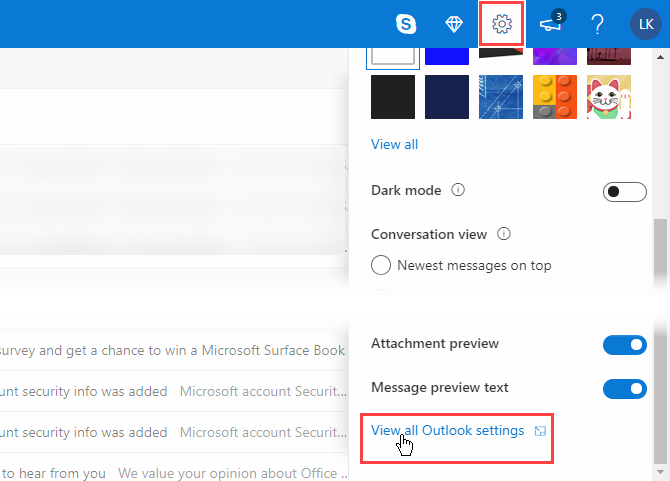
Click the Settings gear icon in the upper-right corner of the window.
Then, click View all Outlook settings at the bottom of the Settings pane.
Step 3: Access the Email Signature in Settings
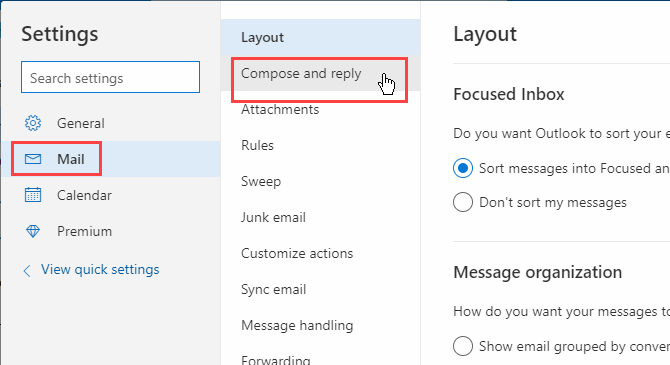
On the Settings screen, click Mail in the left pane. Then, click Compose and reply in the middle pane.
Step 4: Format Your Email Signature
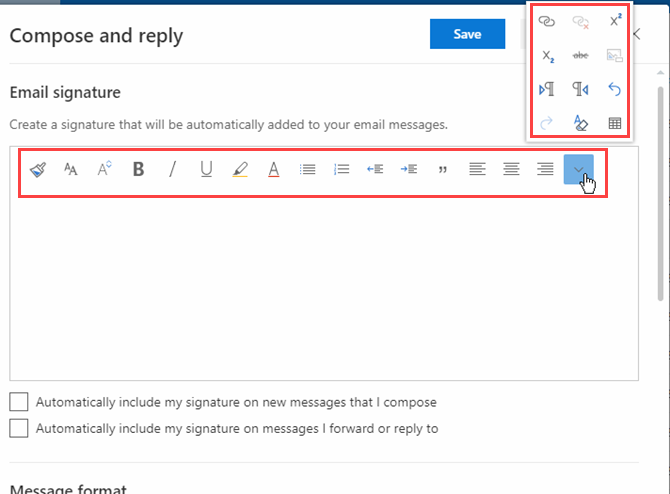
The Email signature box has a toolbar at the top that allows you to format your signature. You can make the text bold, italic, or underlined, and also change the size and alignment of the text.
When we tested the formatting toolbar, it applied the formatting we selected at the beginning of the signature, no matter where the cursor was. So you may have to put your formatted text at the beginning of your signature and then copy and paste it to where you want it.
Step 5: Add an Office 365 Email Signature
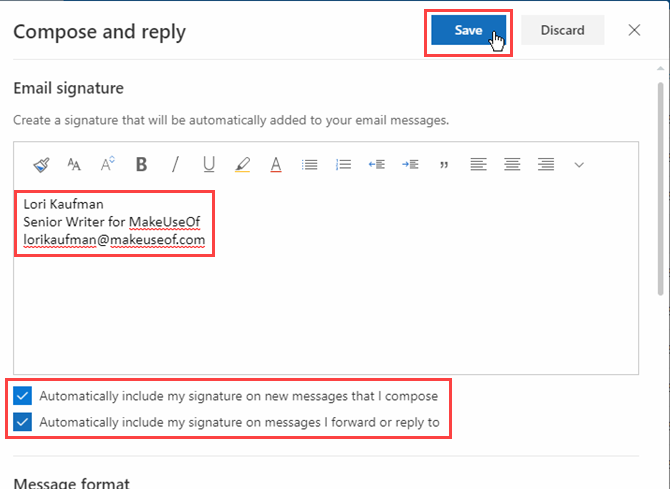
Enter the text you want in your signature in the Email signature box.
The Outlook Web App does not allow you to insert an image file in your signature. But you can copy an image from another program and paste it into your signature. Any text or images you paste are inserted at the cursor, not at the beginning of the signature, like with the formatting we discussed in the previous step.
Alternatively, you can use a free email generator app to design one and paste it here.
There are two options for automatically including your signature in emails:
- To include your signature automatically on all new messages, check the Automatically include my signature on new messages that I compose box.
- To automatically include your signature when you reply to messages or forward messages, check the Automatically include my signature on messages I forward or reply to box.
Because there’s only one signature allowed in the Outlook Web App, the signature is the same for new emails and for replies and forwarded messages. The Outlook desktop app allows you to have different signatures for replies and new emails.
Click Save and click the X in the upper-right corner to close the Compose and reply dialog box.
If you use both the Outlook Web App and the Outlook desktop app, a signature created in one will not be available in the other. You must create a signature separately in each app. The web app only allows you to create one signature. But you can create one default signature and multiple alternative signatures in the Outlook desktop app.
Step 6: Automatically Insert Your Email Signature
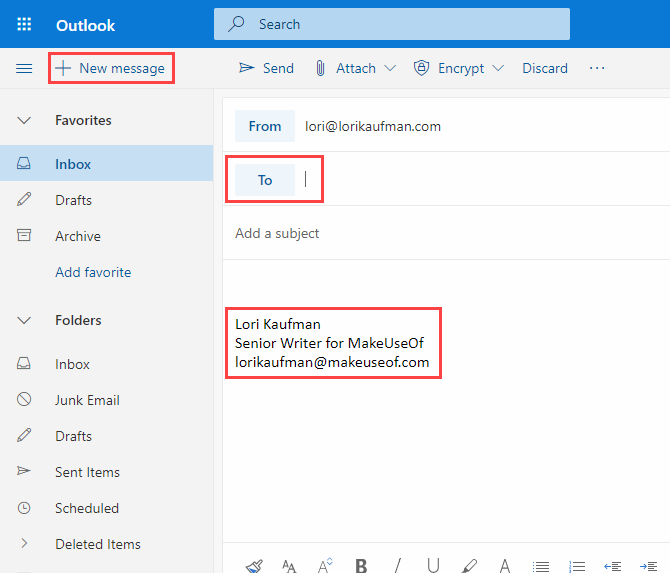
If you selected to automatically insert your signature into all new emails, you’ll see your signature in the message body when you click New message.
Step 7: Manually Insert Your Email Signature
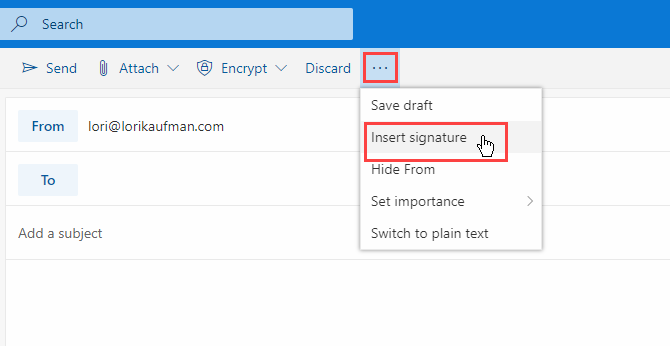
If you chose not to automatically add your signature to all your email messages in the Outlook Web App, you can manually add it by clicking the menu button at the top of an email and selecting Insert Signature.
The signature is inserted into the email message and the cursor is placed at the beginning of the message body. Just don’t forget to add the recipient(s) and a subject line.
Step 8: Change Outlook Email Signature in Office 365
To change your signature in the Outlook Web App in Office 365, simply go back to the Compose and reply screen in the Settings and change the content in the Email signature box.
Your revised signature will be inserted in all new emails, replies, and forwards from this point on.
Communicate Professionally With an Email Signature
Email signatures allow you to easily and quickly make a good personal or professional impression, personally. Just make sure you don’t make the wrong impression with your email signature.
Read the full article: How to Add an Email Signature in Microsoft Office 365
from MakeUseOf https://ift.tt/2yibc36
via IFTTT
0 comments:
Post a Comment