
If you’ve stuck with the default layout or view that Finder on your Mac came with, you’re missing out. The app has three other useful views that work better in different contexts. Let’s take a closer look at them and at the default view.
We’ll discuss the benefits of Finder views and outline tips, tricks, and shortcuts to make the best of them.
1. The Icon View
![]()
Finder starts you off with a grid-based layout of icons called the Icon view. This default view allows you to arrange icons in custom patterns by dragging and dropping them in place.
If the Icon view gets messy, you can clean it up quickly with the special context menu options that are unique to this view:
- Clean Up: To snap misaligned icons to the nearest point in the grid without destroying the custom order in which you’ve arranged them.
- Clean Up By: To align icons to the grid based on their name, size, tags, and so on.
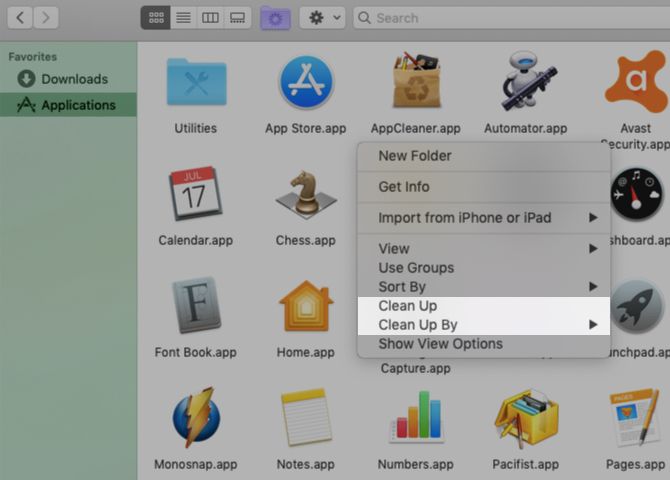
The Icon view also helps when you want strong visual cues to identify Finder items. For example, in the Applications folder you likely find it easy to locate apps by their icons.
You can even switch to custom icons in Finder and change folder colors for better visual organization.
Now, let’s explore the three alternatives to Icon view.
2. The List View
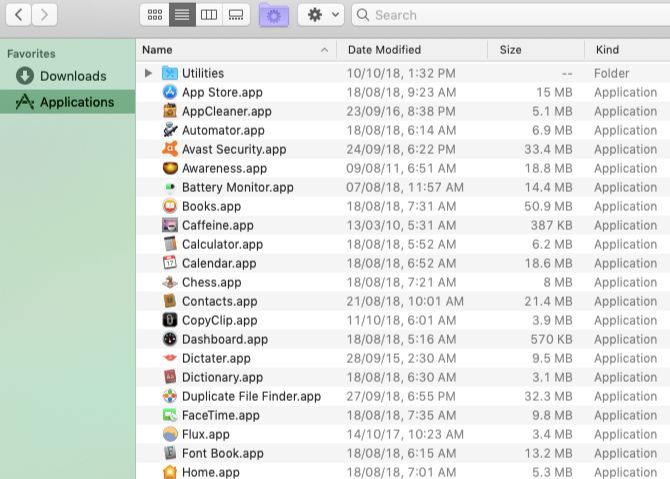
In the List view, Finder contents show up as a list, with various item attributes appearing in columns side-by-side. This view is ideal when you want more details about individual items aside from just their names and icons.
Each item’s size, kind, and date it was modified show up by default. You can display other file attribute columns (such as tags and comments) and also hide visible columns on the fly. All you have to do is Control-click the separator between column names and then click on the appropriate attribute to toggle it.
When you’re looking at a set of folders in the List view, you can expand a selected folder by hitting the Right Arrow key. To collapse the folder contents, press the Left Arrow key.
Now try this: select all folders in a set with the shortcut Cmd + A and then press the Right Arrow key. You’ll see that this expands all the folders together, allowing you to scan their contents at a glance. (Again, Left Arrow collapses them all.)
3. The Column View

Want to copy-paste files without opening separate tabs for the source and destination files? The Column view is perfect for that.
Here, you see items displayed within the Finder’s file hierarchy. As you move from column to column towards the right, you reveal the nested structure where the file, folder, or app actually lives.
If you want columns of equal sizes, hold down the Option key while resizing them. This helps cut down on the horizontal scrolling required when you’re dealing with a deeply nested folder structure. (The Option key trick is just one of the many tiny but useful macOS features you’ll want to know about.)
You’ll find a few more resizing options if you right-click on the separator between two columns.
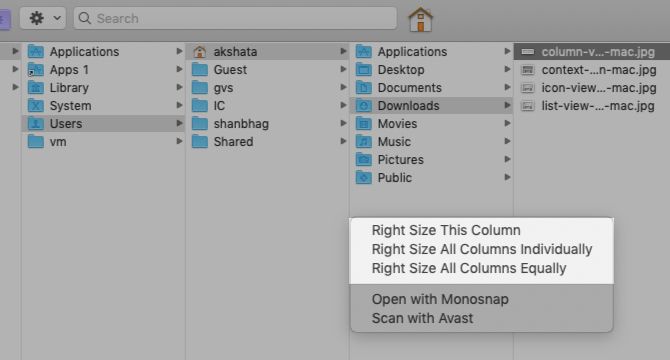
Another useful trick lets you scale a column to fit the longest file name. Just hold down the Option key and double-click on the separator after the column.
4. The Gallery View
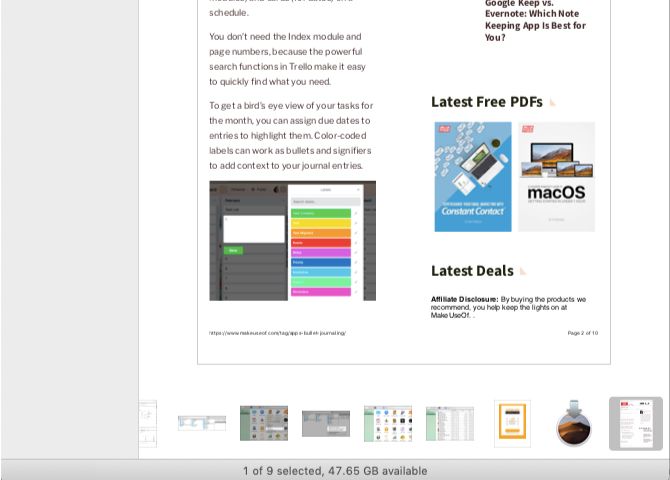
This view displays Finder items as a strip of thumbnails. The contents of the selected file show as a larger-sized thumbnail above the set of smaller ones. Since you can scrub through the gallery thumbnails, you’ll find it quite easy to pinpoint the files you’re looking for.
The Gallery view is helpful when you want to find the right images or documents without having to open them. It’s also faster than sifting through said items with the Quick Look preview feature.
If you haven’t updated to macOS Mojave, you’ll have a Cover Flow view instead of the Gallery view. This is similar to Gallery view, but it displays folder contents as a list and not as a set of thumbnails.
5. How to Switch Finder Views

To jump between the four Finder layouts or views, you’ll have to use the set of four toolbar buttons located to the right of the Back/Forward buttons.
You can also click on the corresponding View menu options:
- as Icons (Cmd + 1)
- as List (Cmd + 2)
- as Columns (Cmd + 3)
- as Gallery (Cmd + 4)
Keep in mind that the Preview pane that displays information about a selected Finder item has nothing to do with any of the views. It stays put no matter which Finder view you switch to. If you want to turn off this pane, click on View > Hide Preview.
6. How to Customize a Finder View
Want to scale up the icon size in the Icon view or display larger thumbnails in the Gallery view?
You can do that and more from the View Options panel. To bring up this panel, switch to the folder whose view you want to customize and click on View > Show View Options. For a quicker method, simply hit Cmd + J.
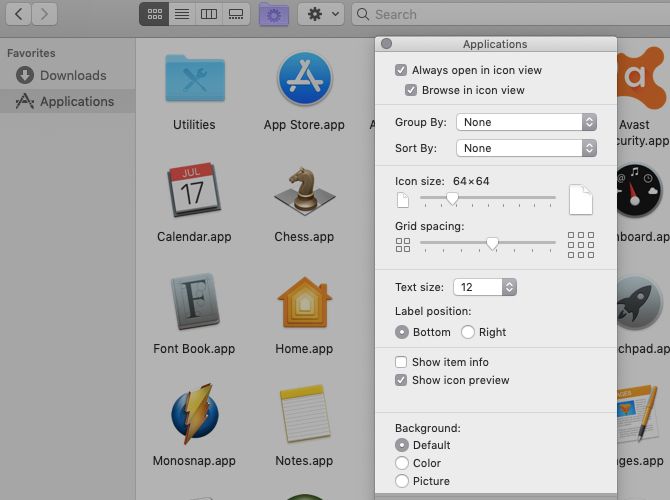
You should have no trouble tweaking the settings for any view, since the contents of the View Options panel are intuitive. To ensure that you’re editing the settings for the right folder, see that the title of the panel matches the folder name.
Keep in mind that the panel contents are mostly unique for each view. So you can, say, add a new background only in the Icon view or scale thumbnail sizes only in the Gallery view.
However, you’ll also find a few options in common for all views. One such option is Sort By. It lets you sort Finder contents by name, size, tags, etc.
This particular option comes in handy when the Clean Up and Clean Up By context-menu options in the Icon view go missing. Selecting Sort By > None either from the context menu or from the View Options panel brings back those missing options.
The second common setting across all views is Always open in [View Name] view. This checkbox sets the default view for that folder. If you want the subfolders to reflect the same view, you’ll also need to select the corresponding sub-option: Browse in [View Name] view.
Want a subfolder to use a different view instead of reflecting that of its parent folder? You’ll have to tweak the subfolder’s View Options panel separately to configure the Always open in [View Name] view option.
7. Use a Customized View Across Finder
Let’s say that you’re customizing the List view for a particular folder from its View Options panel. If you want these custom settings to apply to the List view across all folders in Finder, click on the Use as defaults button within the panel.
![]()
There’s More to Finder Under the Surface
If you only use Finder as a basic file explorer, you’ll lose out on many useful elements hidden in the app. The special views we discussed above are a case in point. Then there are:
- Tags, which help you find files faster
- Aliases, to reduce Finder clutter
- The special functions associated with the Option key
To get the best of Finder, we suggest a spot of exploring and customization. Begin with our starter tips for Finder and then move on to advanced tips like setting up smart folders.
Read the full article: 7 Nifty Tips for Getting the Most Out of Finder’s View Options on Mac
from MakeUseOf https://ift.tt/2z3gIGj
via IFTTT
0 comments:
Post a Comment