
Smart Folders are one of the most underused features of macOS. Which is a shame, because they make it much easier to find files on your computer.
They can save you a huge amount of time and change the way you use your Mac. But getting them set up properly takes a few steps.
We’ll run through an entire Smart Folders tutorial for Mac users—but first, let’s talk about what Smart Folders really are.
What Is a Smart Folder?
Strangely enough, a Mac Smart Folder isn’t actually a folder. It’s a saved search. But macOS displays these saved searches as folders so they’re easier to find and access.
When you create a Smart Folder, you choose a property or series of properties. macOS then looks through all your files and displays everything that matches this in a single folder, no matter where the files are stored on your computer.
Let’s take a look at how to make a Smart Folder to capture all the files you want in a single place.
How to Use Smart Folders
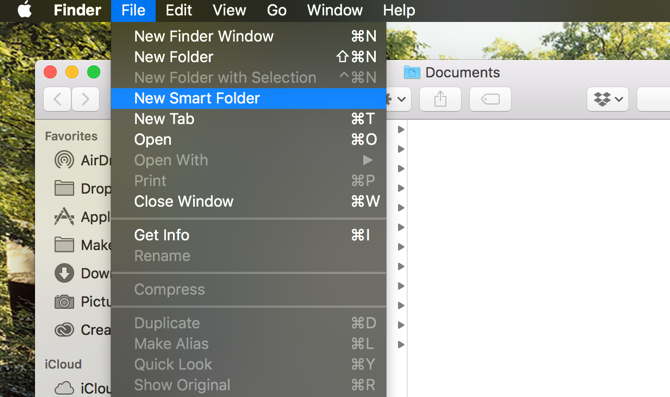
Open a Finder window and go to File > New Smart Folder.
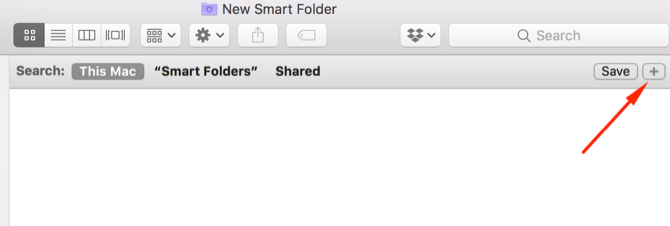
You’ll get a new window with a search bar that wasn’t present before. You’ll see that you can search This Mac, your current Finder folder, or Shared files. (Selecting This Mac makes the Smart Folder search through every file on your computer.)

To create the search criteria, click the Plus symbol on the right side of the window:
You’ll see two menus; in this case, they’re Kind and Any. You might see another set of dropdowns, like Name and matches. The steps below will work with any combination.

Clicking Kind displays some search parameters. This is the type of smart search you want to run. Default options are kind (file format), last opened date, last modified date, created date, name, and contents.
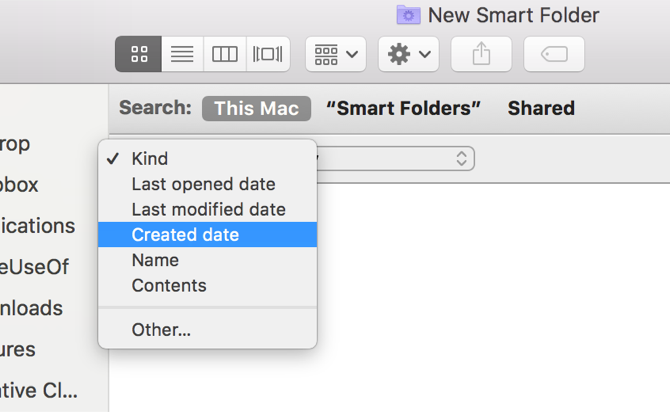
The Other entry carries many more options, but we’ll talk about those in a moment.
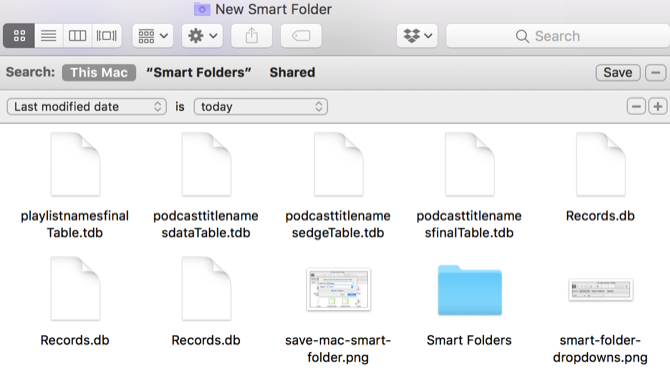
The choices in the second menu depend on what you choose in the first. If you selected Kind, you’ll see a number of file types that you can filter for. If you chose Last modified date, you’ll see some temporal options:
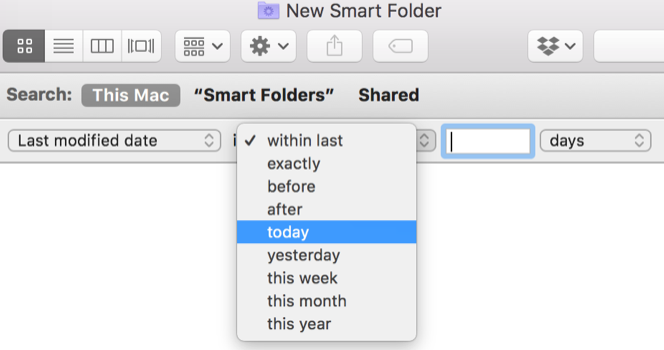
When I choose today, every file that I’ve edited today displays:
Saving and Accessing Smart Folders
You can fine-tune the search by clicking the plus symbol on the right side of the screen and adding more parameters. For example, I could select Kind/Image/PNG to only see the PNGs that were edited today.
To save your Smart Folder, hit Save on the right side of the screen. The default save location is in the User > Library > Saved Searches folder:
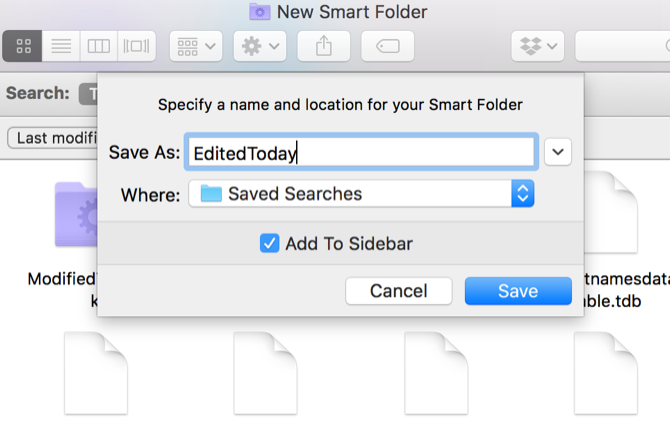
You can also add the Smart Folder to your Finder sidebar so you can access it quickly.
Note that you can save the Smart Folder wherever you want. User > Library > Saved Searches isn’t an especially convenient location (as the Library folder is hidden by default), but it does keep them all in the same place.
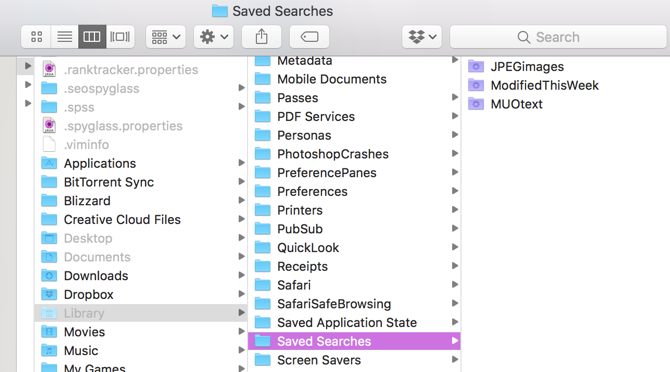
If you can’t see the hidden Library folder, type this command into Terminal and hit Enter:
open ~/Library/Saved\ Searches
That will open the Saved Searches folder. Add either your saved searches or the Saved Searches folder to the Finder sidebar to save time.
How to Delete Smart Folders
Deleting your Mac’s Smart Folders is easy. Just head to the Saved Search folder (using the Terminal command above or any other method you like), select a Smart Folder, and send it to the Trash.
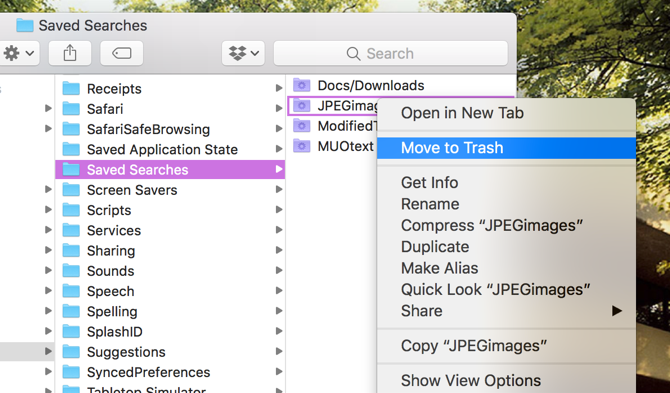
You can’t delete items from the sidebar, so remember this method (or make a shortcut to the Saved Searches folder in the sidebar).
How to Edit Smart Folders
You can change the search criteria for a Smart Folder with just a few clicks. Open the Smart Folder and click the gear in the menu bar. Select Show Search Criteria:
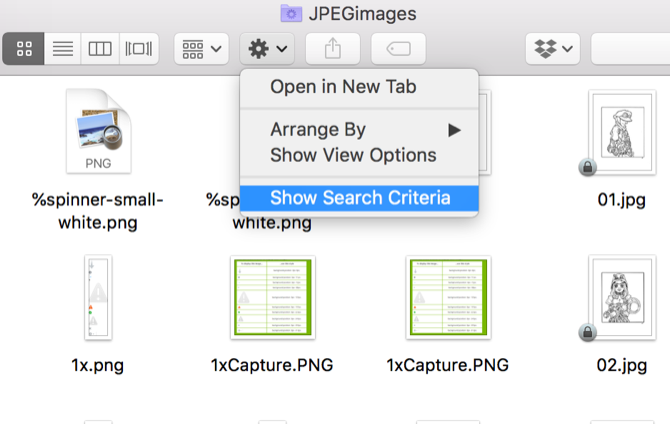
Then edit the criteria as you would normally.
Additional Smart Folder Search Options
When we looked at the search criteria earlier, the final option was Other. Let’s take a closer look at that.
When you select this option, you’ll get a huge range of search criteria. There are too many to list here, but you can include attributes like chat services, alpha channels, whether the file has a custom icon, photo exposure time, musical genre, creating organization, and more.
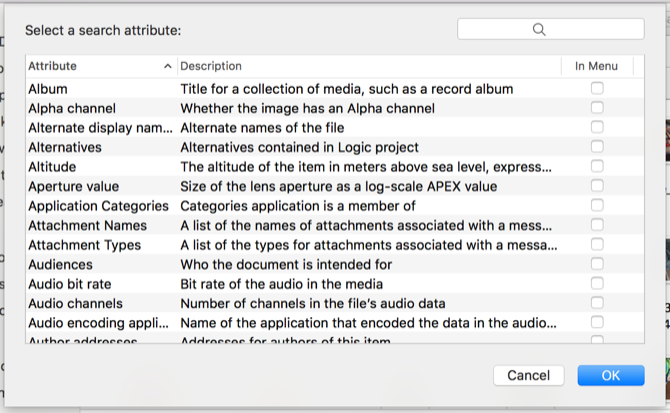
You can also use the search bar to find attributes quickly. To use one of these attributes, select it and click OK (you can also check the In Menu box to make it display in the dropdown).
We’ll take a look at a few of these attributes next.
The Best Smart Folders You Should Use
Want to take full advantage of Smart Folders? Here are eight that you can start using right now.
1. Files Larger Than 1 GB
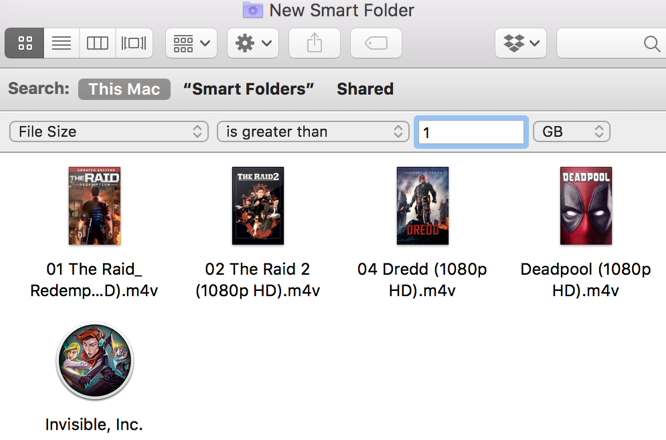
Want to clear out those big files that are taking up space on your Mac’s drive? Just use the File Size option and set the size to 1 GB (or whatever size you’d like).
2. DMG Installers to Delete

Disk images can pile up quickly if you install a lot of apps. You can easily find them all with a saved search for File extension/dmg.
3. Apps You Haven’t Opened in a While
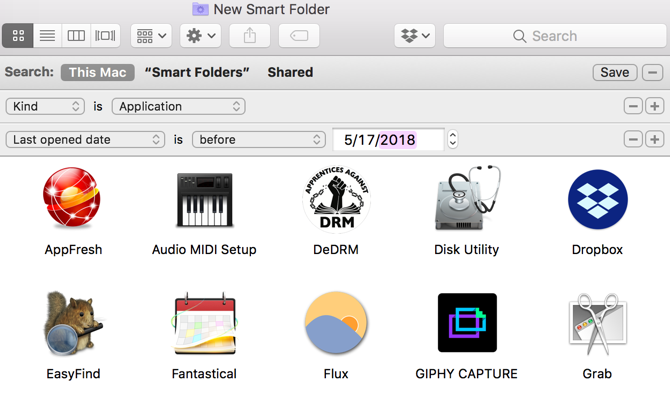
By combining Kind/Application with Last opened date, you can look at the apps you haven’t opened in any period of time you’d like. For this example, I’m looking at apps that I haven’t opened in a couple of months.
Maybe it’s time to clean your Mac!
4. Photos Taken on Your iPhone
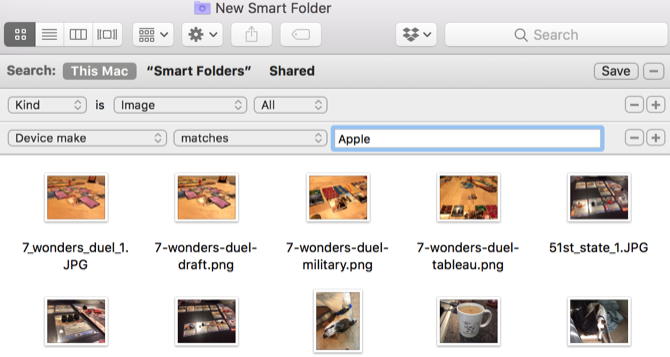
By adding the Device make attribute to Kind/Image, I’ve limited my search to images that were created by an Apple device. In my case, that’s almost exclusively iPhone photos. You can dig into the settings a bit more to get even more specific by limiting the device models.
5. Files With Specific Tags

Tagging files in macOS is a great way to keep you data organized. Using Smart Folders, you can get specific tag results. Try combining different tags, searching for specific file types that have a tag, or any other combination of attributes.
6. Recently Created Documents
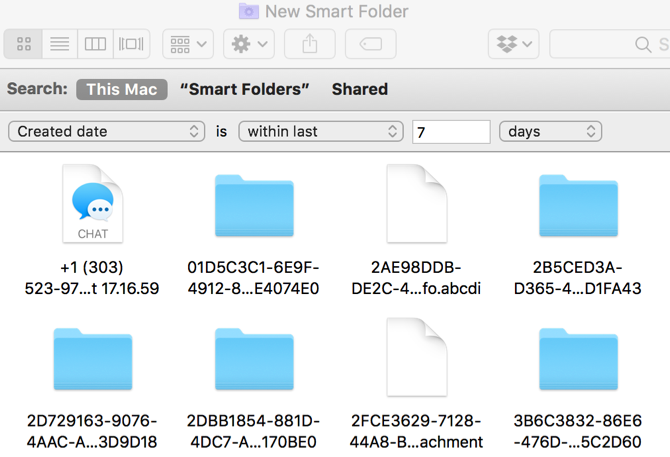
Want to see all the files you’ve created within the past week or month? The Created date attribute lets you select a time period with ease.
7. All Media Files
When you hold down the Option key, the plus on the right side of the screen turns to three dots. When you click those dots, you’ll get a Boolean operator Smart Folder. Use that to create folders that contain the results of multiple smart searches.
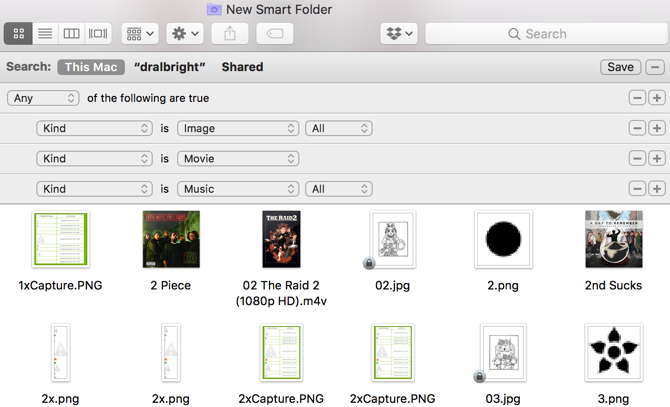
In this example, if a file is of the kind Image, Movie, or Music, it shows in the Smart Folder. You can use this tactic to get all sorts of combinations of files.
8. Duplicate Downloads
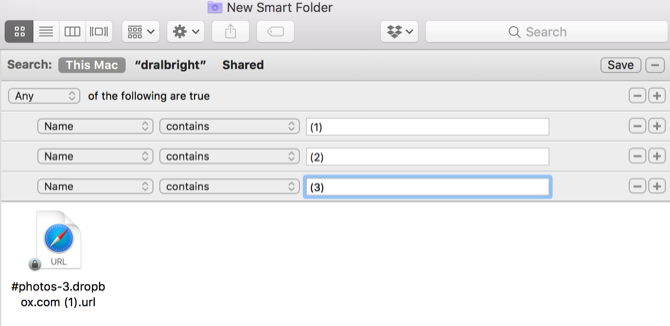
When macOS sees files that have the same filename, it appends a number in parentheses to them. Using a Boolean search to find files than have (1), (2), or (3) in the filename will help you find those duplicate files, no matter where they are.
Use Smart Groupings in Other Apps
Once you’ve created your Smart Folders, you can start using macOS’s smart capabilities in other apps, too. Check out our tutorial on smart group filters to find out how you can make smart contact lists, smart photo albums, and smart mailboxes.
Read the full article: 8 Smart Folders You Need on Your Mac (And How to Set Them Up)
from MakeUseOf https://ift.tt/2I5QjLN
via IFTTT
0 comments:
Post a Comment