Apple hardware is often cited for reliability, but you can end up with an expensive fix when something goes wrong. That’s why it’s great if you’re able to perform your own hardware tests before approaching an Apple professional about a potential fix.
Thankfully, testing your Mac at home is free, simple, and takes only a matter of minutes.
Apple Hardware Test or Apple Diagnostics?
Which version of Apple’s hardware test you’ll use depends on the age of your Mac. Computers released before June 2013 will use Apple Hardware Test. Computers released after June 2013 will use Apple Diagnostics instead.
The older Apple Hardware Test (AHT) doesn’t provide as much information about your system as Apple Diagnostics. It runs cursory tests on components and determines whether they are present and operable. The results are fairly easy to interpret, but not particularly detailed.

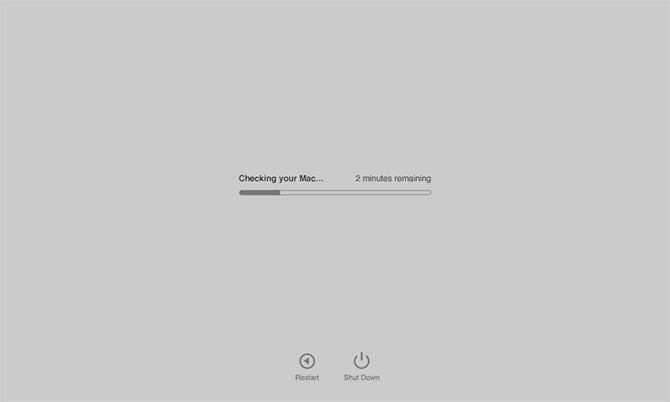
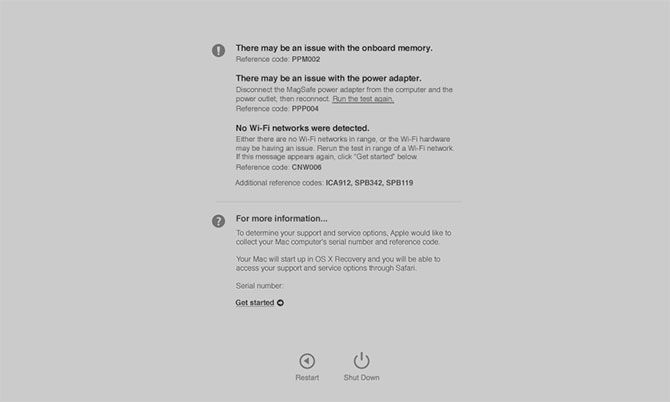
Apple Diagnostics provides more information about your Mac’s hardware than AHT. At the end of the test, you’ll get an error code which you can use to help decide which hardware components are having an issue and what to do about it.
Neither of these tests are as conclusive as Apple Service Diagnostics (ASD), which is Apple’s own in-house testing. If you take your Mac to an Apple Store for a Genius Bar appointment, they’ll hook up an Ethernet cable and run ASD to get far more detailed results about the status of your machine.
My iMac is having some serious issues with the HD. Found Apple Service Diagnostics to run on it. I have a feeling that I’ll need to buy a new HD.
— David Rogers (@davidjrogers) April 9, 2018
While there’s no official support for ASD beyond that provided to Apple’s technicians, you can download 25GB of diagnostics discs from the internet Archive.
How to Test Your Mac
Regardless of which diagnostic tool you’re using, the method for testing your Mac is the same:
- Shut down your Mac.
- Disconnect all external devices except your keyboard, mouse, display, wired network connection (if you have one), and power cable.
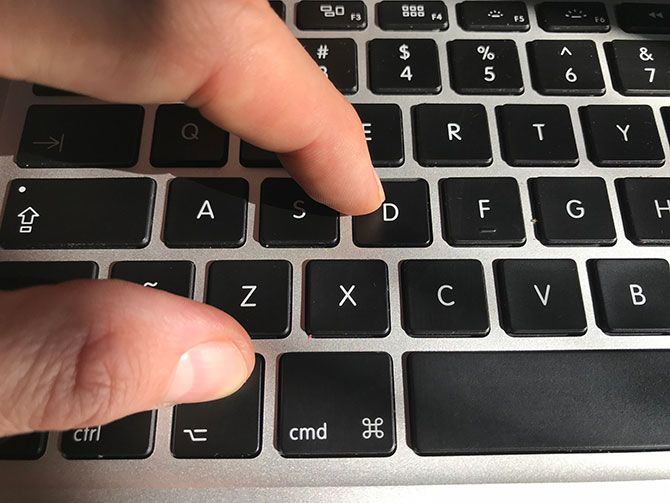
- Turn on your Mac and immediately press and hold the D key.
- Release the D key when the Hardware Test or Diagnostics tool appears onscreen.
- Select your language.
If you’re using the older Apple Hardware Test there’s one more step: press the T key to begin the testing procedure. You can also check Perform extended testing to run a more thorough and time-consuming diagnostic. If you’re using Apple Diagnostics, you only need to specify your language.

You will see your results onscreen once the scan is complete. Make a note of any reference codes you receive, since you’ll use those to interpret your results in the next section.
Help! My Mac Won’t Run Diagnostics
It’s possible your older Mac doesn’t include the diagnostic tool on its disk. If your disk or startup partition is damaged, this may cause the diagnostic test to not run at all. In this instance you’ll need to run the diagnostic via the internet.
It’s easy to do, but it will take longer since you’ll need to download the relevant tool before you can begin the procedure. In order to run a diagnostic test from the internet, follow the same procedure outlined in the section above but hold the Option + D keys instead of just D.

You’ll need access to the internet via a wired or wireless connection for this to work.
Interpreting Your Diagnostic Results
Apple Hardware Test should provide some fairly easy-to-understand diagnoses, including reference codes. I tested an old MacBook Air that has no battery in it, and the AHT report and reference code matched up.
If you’re using Apple Diagnostics, you’ll have a greater array of codes at your disposal. You can cross-reference them using the Apple Support reference codes list. Some notable reference codes include:
- ADP001: Good news! This means no errors were detected.
- NDD001: Possible problems with USB hardware; make sure all USB devices are disconnected.
- NNN001: No serial number detected; are you running a Hackintosh?
- PFR001: Possible problems with firmware.
- PPM001-015: Possible problem with computer memory.
- PPR001: Possible problem with CPU.
- PPT001: Battery not detected.
- VFD006: Possible problem with GPU.
- VFF001: Possible problem with audio hardware.
While these codes only provide a limited amount of information, it might be enough to point you in the right direction. If you’re getting battery errors, it’s probably time to replace your battery. You might even be able to save a few bucks by fixing it yourself.
Others codes might raise more questions than answers. If you’re getting memory errors, it’s probably worth following up with a more in-depth testing tool. We recommend a free tool called memtest86, which you can run from USB for a detailed scan.

Other problems are tricker to resolve. If you’re getting errors about your Wi-Fi or Bluetooth hardware, it might be worth spending a small amount of money on a USB adapter that offers a workaround for dodgy internal hardware.
Problems with your main processor or graphics processor are harder to isolate and resolve. Further, you might find that your computer passes Apple’s tests but still has issues. At this stage, it’s probably worth talking to a professional or considering a replacement model.
Fix Your Own Mac Hardware for Free
While it’s not as easy as repairing a Windows PC, you can fix Apple hardware at home. Be aware that if your machine is old, the cost of Apple’s expensive parts might not be justified when you take the price of a new machine into account.
Even if your old Mac is dying, you might be surprised what you can get for it if you choose to recycle or sell second-hand. If it’s time to say goodbye, you can put that money toward a replacement model.
from MakeUseOf https://ift.tt/2H5iAkH
via IFTTT
0 comments:
Post a Comment